How to secure rest api’s in springboot with Auth0?
In this blog, I explained how I secured a REST endpoint in my Spring Boot service using Auth0. The main goal of my project was to ensure that only authorized clients can access and perform certain operations on the API.
Note: Code for this exercise is in my github repository arunpatilgithub/springboot-opa-demo/
Configure API in auth0.
We will first begin with configuring our api in auth0. We need to have developer account auth0 to move forward. You can refer the documentation https://auth0.com/docs for signup process.
Once you signup, you can navigate to Applications -> APIs to register our api to secure.
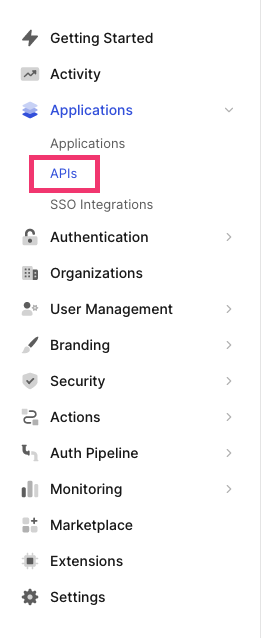
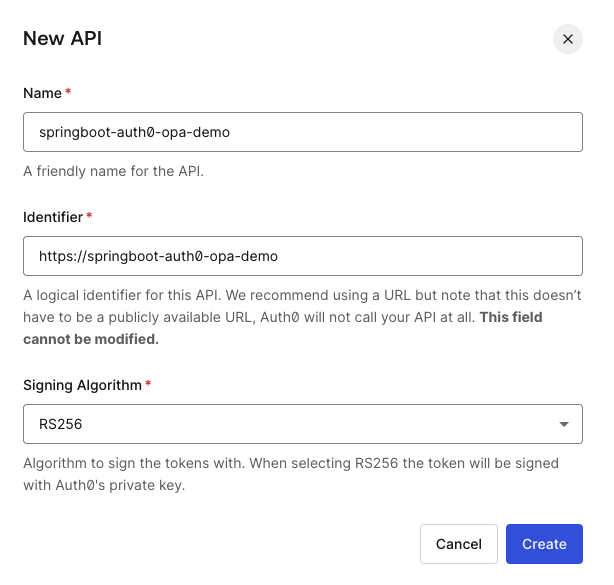
Here I have created an api with name springboot-auth0-opa-demo. You can enter any unique identifier for your api, example a URL etc. The form to create api has good information on what we need to specify for each field. I just used https://springboot-auth0-opa-demo. You can leave the signing algorithm to RS256. This algorithm is how the keys are signed. Then hit Create to register the api.
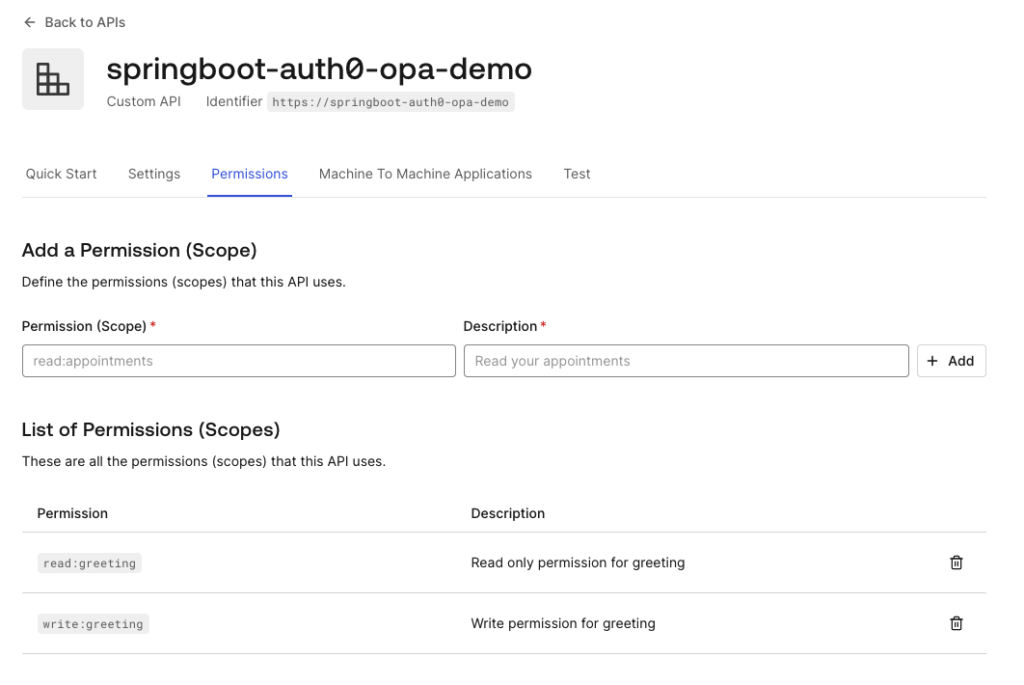
After registering the API, we can now move on to defining permissions for accessing this api. We can leave all the default settings as is on Settings tab. Let’s switch to Permissions tab to configure specific scopes or permissions caller needs to have to execute this api. We can configure multiple permissions here for different actions on our endpoint e.g. Let’s say we have CallerA application who needs to have access to GET and PUT endpoint only, then we can create a scopes called say read:getendpoint , write:putendpoint and have these scopes/permissions authorized to CallerA application. Similarly if there is a CallerB, who only needs to have access to GET endpoint, then we can give permission to only read:getendpoint scope to CallerB. We will see how we assign scopes to applications in next few sections.
Let’s create two scopes for now read:greeting and write:greeting.
The permissions we created above needs to be assigned to certain calling application. After all, our end goal is to make sure our api’s are called by authorized applications/callers only. Also, not just authorized but also they need to have certain permissions.
Let’s register a test caller application in auth0. We will navigate to Applications tab on register this caller app.
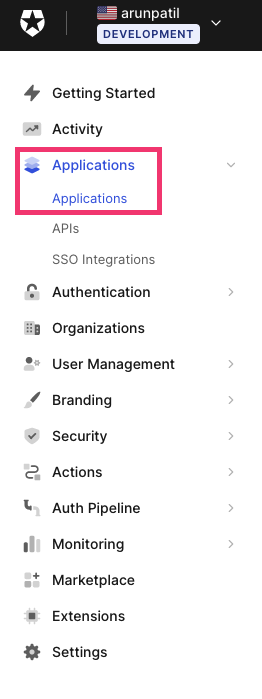
Let’s say this caller application is another backend api who will be calling springboot-opa-demo api we created earlier. This when creating this new application we can select Machine to Machine Applications option.
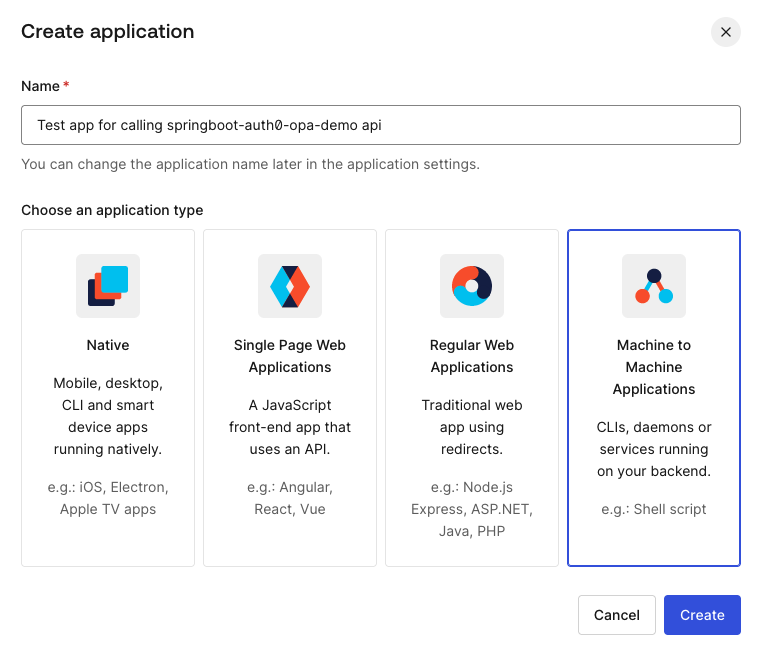
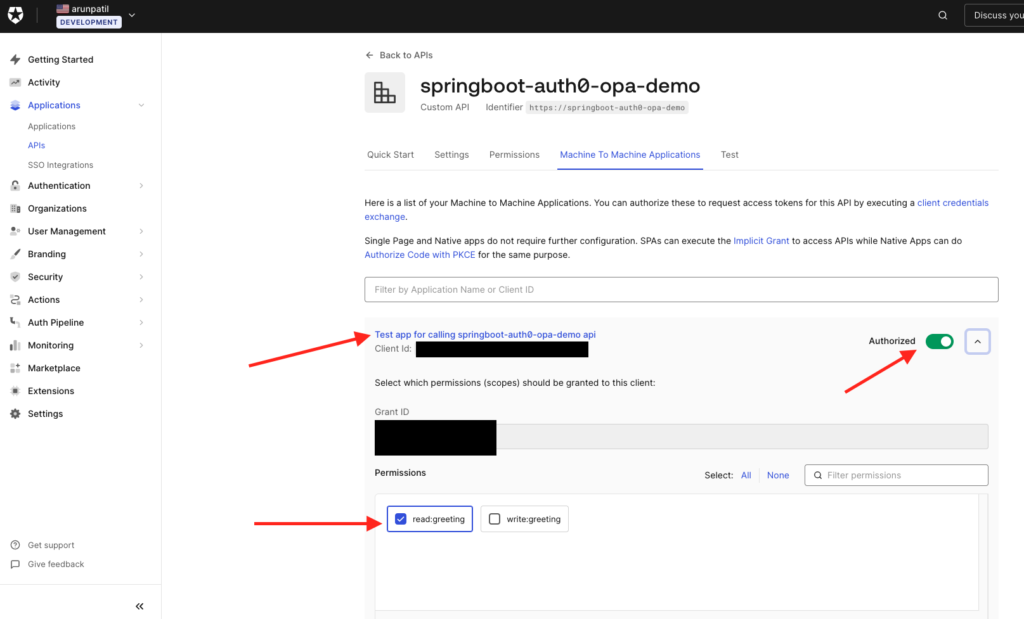
As soon as you click created, you will be prompted to select an API this application needs to have permission to. You may not see this screen if you do not have any api created. But since we have springboot-auth0-opa-demo api created, we will select it here. If you decide to register this test app first and then api, in that can we still still set permissions for this caller app from api configuration page which I will show below. For now, let’s select our api and click authorize. As soon as you click Authorize, we will be asked about the scopes/permission that needs to be granted. Let’s select read:greeting only for this demo purpose.
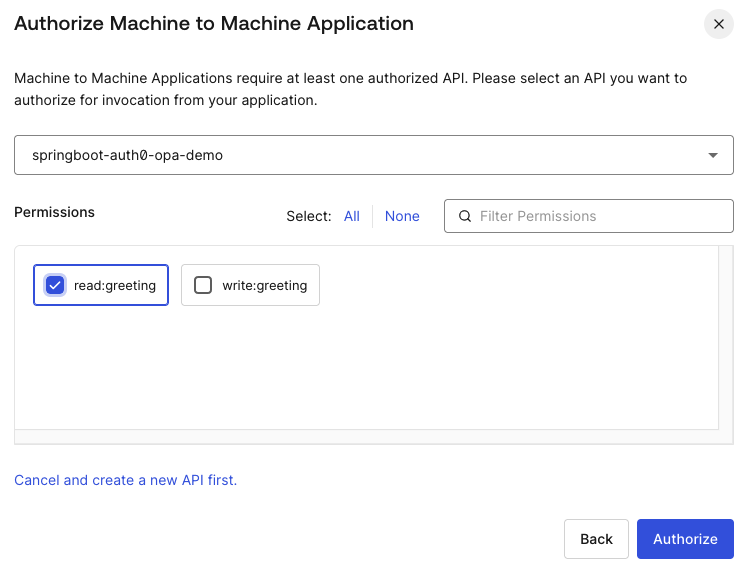
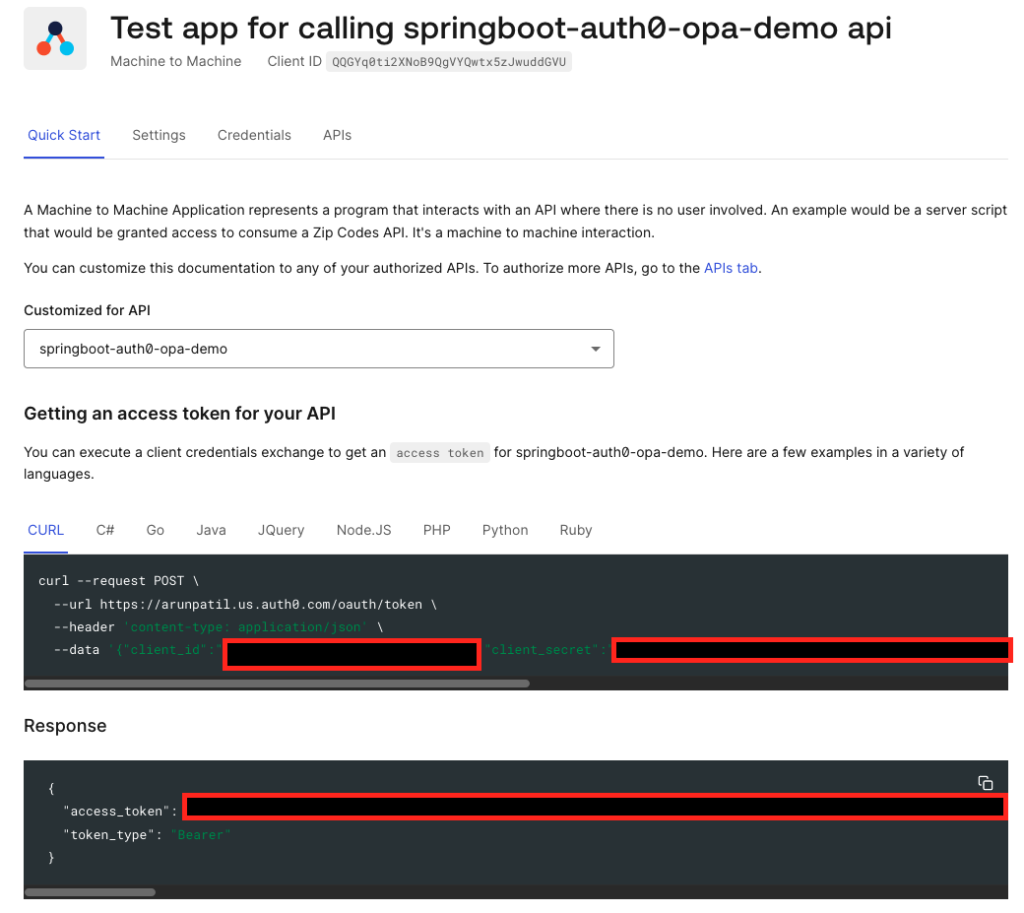
Once authorized, our test caller app is created and has read permission on our api we created. This test caller app is granted client id and secret which we can see on the settings page. These credentials are used to generate secure JWT token that can be in turn used to call our secure api.
Auth0 UI will also give you the code to generate this JWT token and can also give you the token directly. This will get handy when we want to test our secure api.
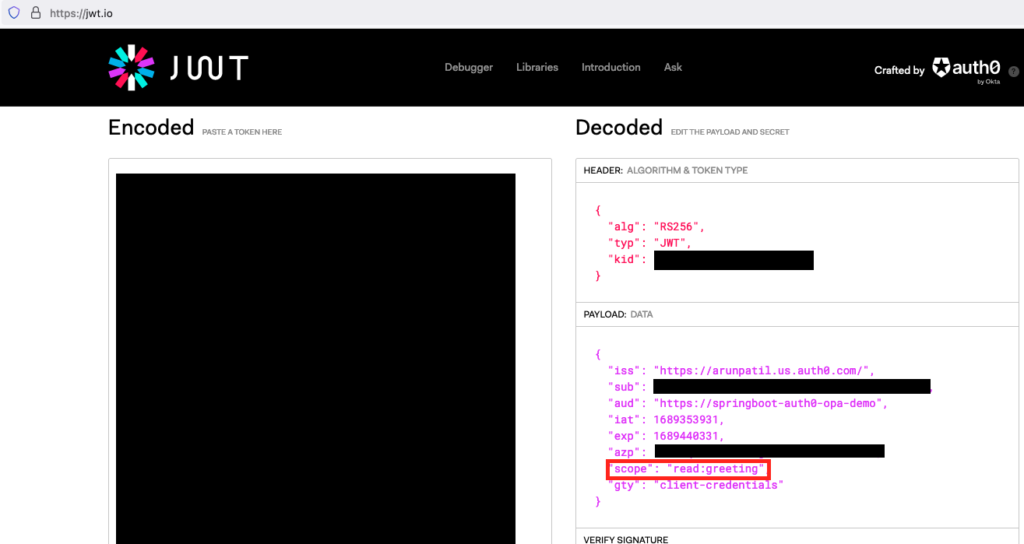
If you decode this token (https://jwt.io/ ), you will notice that it has the scope that we granted to this caller app.
As I mentioned earlier, in case if you are creating this test caller app first and then the api, then we can assign permissions on the API page for the scopes to be granted to the caller app.
We have all the configuration completed in Auth0. Let’s now create a sample springboot application that will have two endpoints(read and write) that we want to secure. And we will test weather the caller app created above is able to access both the endpoints or only certain ones.
I am not going to go through detailed steps for creating this springboot application as it will make this post unnecessarily big. The complete code of this is available on my github repository -> arunpatilgithub/springboot-opa-demo/
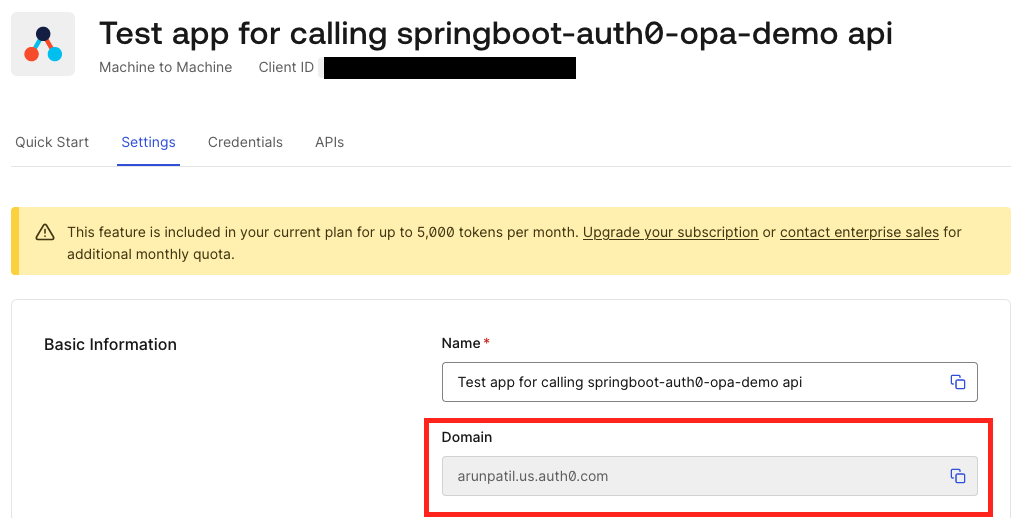
Only important things to note is to make sure you update application.yaml with your auth0 domain. Domain name format is your tenant name followeed by the region. You can view your domain settings tab of the test caller app we created.
This service have two simple endpoints. One is GET /greeting and another one PUT /greeting/{name}.
To summarize the setup so far –
1. We created springboot-auth0-opa-demo api in auth0 which has scopes/permissions configured as read:greeting and write:greeting
2. Then we created caller app in auth0 to invoke the api. However, we have given only read:greeting scope/permission to this app and not write:greeting. Now this caller will be an actual service who will be using the credentials of this caller app. For this we created springboot app.
3. The springboot application exposes two apis. GET /greeting and PU /update/greeting/. And in the springboot application, we have configured security in such way that we need read:greeting scope to hit GET endpoint and write:greeting scope to hit PUT endpoint. Not that the credentials that will be used by this service do not have permission to write:greeting.
Now let’s test the setup. We will be using Postman to hit the endpoint. Also note that I have not written the code to generate the token using client and secret. Again, it’s not necessary in this case. Instead, we will be invoking the api directly using the jwt token we will get from auth0. This jwt token is generated using the same client/secret we have for the caller app in springboot.
Make sure you start the springboot application before testing.
Testing GET endpoint
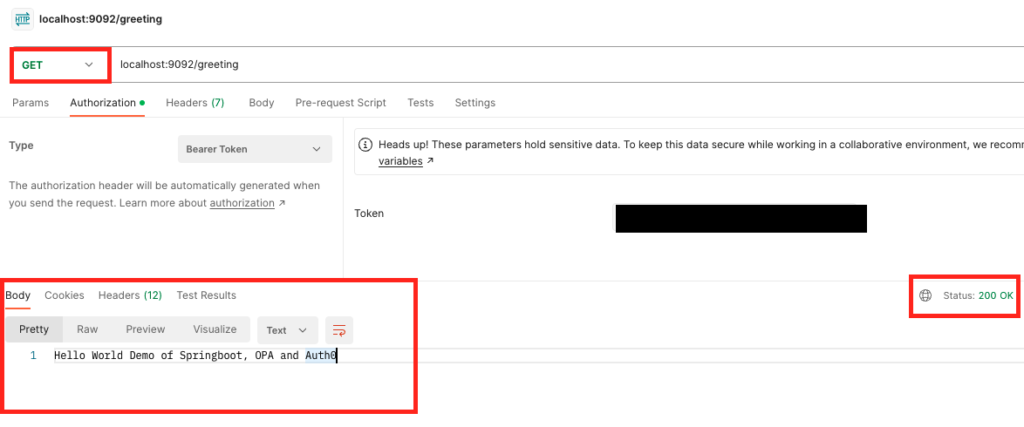
If we hit the GET endpoint with the token generated on auth0 for the caller app, we get success response as “Hello World Demo of Springboot, OPA and Auth0”
But if try to hit the PUT endpoint, you will get 403 error. Which means that we do not have permission for this endpoint.
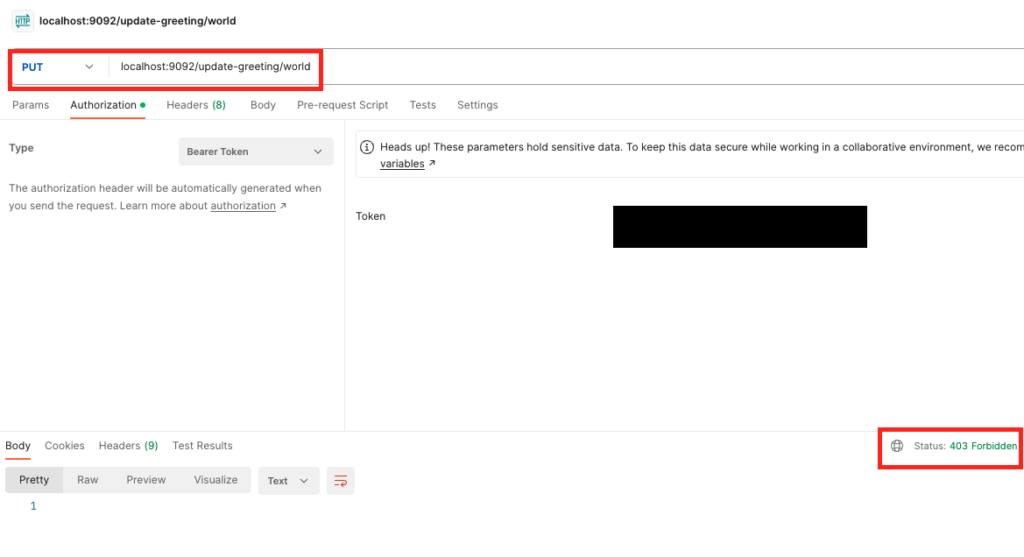
Thus the security configuration works as expected.
Let, give this app the write:greeting permission as well in auth0 to make sure that it can make the PUT call.
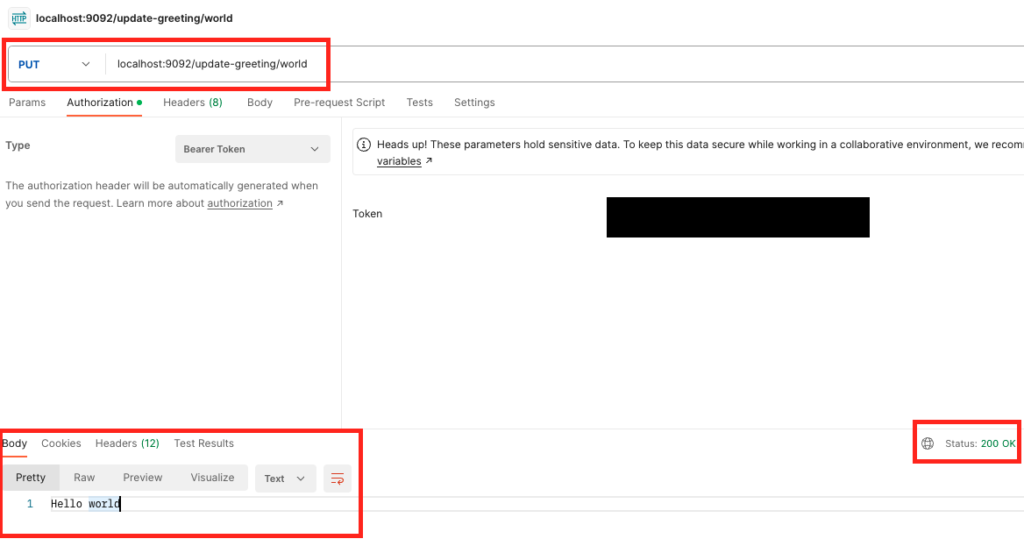
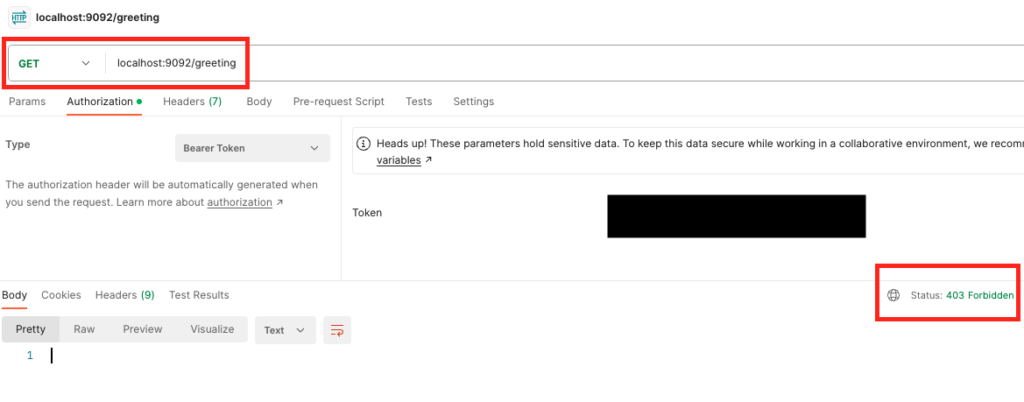
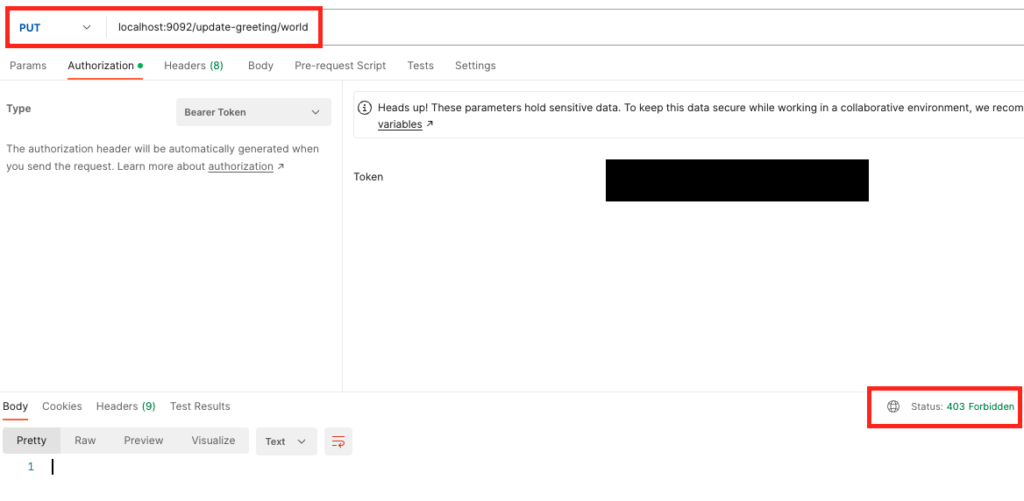
For the last activity, let’s revoke all permissions and test if we can still make call.
This time, we get 403 error for both GET and PUT endpoints.
In conclusion, my blog served as a comprehensive guide on securing a REST endpoint in a Spring Boot service using Auth0. By following my instructions and harnessing Auth0’s authentication and authorization features, developers can ensure that their APIs are protected and only accessible to authorized clients with the appropriate permissions.